Within days my brain could not stop thinking about the splash of color dripping from her ends, and I soon found myself contemplating the technicality that would go into such a process. Why would I spend all of this time figuring out such a tedious procedure if I wasn't actually going to find myself a willing model and delicately attack their ends with the color wheel? But who? And when? And why...why not just attempt it on myself? Well this brings a whole new element of planning in my head, and then perusing the internet for tutorials, tips, color lines, and reparative treatments. Oy, the stress...but the possibilities! Before long, the thought consumed me, keeping me up late at night weaving strands of foil in my imagination, and staring at my tousled hair in the mirror thinking that it would be superior had it been dipped into a rainbow! That settled it. The next few days consisted of multiple tutorials (thank you, youtube), stalking of other "dippers", and researching for the best color line. The logistics were set, my shades were picked, and the time slot was carved out of my weekend.
I set out on a 6-hour process, the longest ever spent on a single head of hair, and the most tedious and intricate I have ever been. As I weaved and foiled, painted and re-painted, checked and double-checked, rinsed, washed and repeated, I laughed to myself, thinking of how I used to scoff at the thought (or look) of having one out-of-place highlight or one discolored strand, and here I am, painting rainbows in my hair.
Am I happy with my outcome? Let's just say that if my hair embodies a slightly unpleasant aroma, I apologize, but I am going few and far between washes to hold onto my beautifully hued tips! I. Love. It. Partly because I spent so much energy and arm strength to achieve my final product, but mostly because it's unique and spontaneous and exemplifies art.
Here is my dauntingly tedious step-by-step process. Things to keep in mind: 1.) DIY should really apply to trained stylists only. Not that they're trained specifically in dip-dying, but most important in bleaching up ends to a light blonde, without the ends completely slipping right off. You want to have ends to dip-dye after step one, otherwise the process is mute. Just sayin'. 2.) I am silly. You will see this through my pictures. Please also regard the fact that this was a 6-hour process and I may have been a wee bit tired nearing the end result, i.e. sillier. 3.) If you find yourself dreaming of dip-dyed ends after this post, don't lose sleep over it, just message me. Let's make beautiful rainbowed split-ends together.
Step 1: Kill your ends beyond belief. Split ends are in the past, fried ends are your tomorrow. Bleach, 30V (or 40V if your hair is resistant), foils and time. It's that simple to kill the ends that you've been nourishing with leave-in conditioner for years. Heat helps too. Well, let me elaborate: heat helps with your ends bleaching out, NOT in helping them stay healthy. Duh. Somehow I didn't get a picture of the bleach in the bowl, but just picture marshmallow fluff in a bowl and you've got yourself bleach with 30V. Apply the bleach to about 3 inches of your ends. I wove a few strands out so they would stay "natural". This is not a must, just something I did because, honestly, I was a chicken and wanted some natural strands to interlace with the rainbows, just in case the rainbows were too bright and overpowering. Looking back, those left behind strands were not necessary.
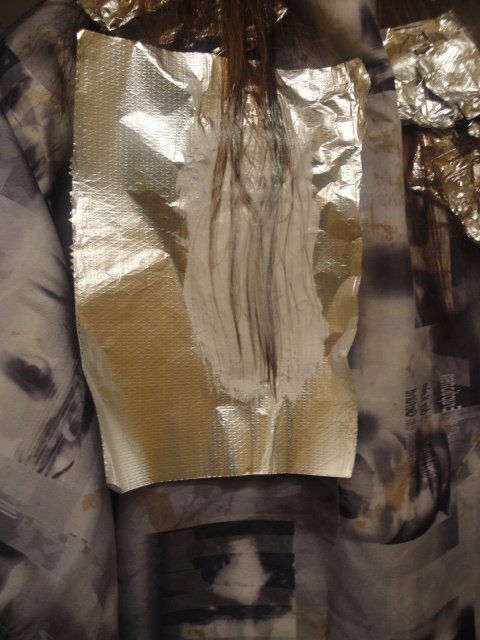

Step 2: After processing the bleach for about 40 minutes, check out your progress. Open a foil and hope for platinum goodness. Just kidding. All you see is day-glo orange? Or a brassy dark blonde? Shocker. Apply some more of that bleach (yep, right on top of the old, that has now completely dried from your hair sucking up its chemicals) and fold that bad-boy back up to continue processing. Some foils will need it more than others, depending on where you started with the bleach and depending on what those particular ends were like before.


After you have finally reached a hue of blonde that you are comfortable with, without going so far as to lose your ends altogether, it's time to give them a little breather, away from the chemicals and blankets of foil. Rinse, thoroughly, and condition plenteously! Let your ends soak up that conditioner the same way they did the bleach. Then rinse, again thoroughly. I had some spare time so I let my hair airdry instead of taking the blow-dryer to my already screaming ends.
Process 1, complete! I sort of LOVED this instant ombre look, so at least I know what I have to look forward to when my colors rain away.

And just in case you need to see those crispy ends up close....

After a while I did blast them with a little medium heat to get them to fluff out so I could see exactly what I was working with. You want to apply the color to completely dry hair. I reiterate, completely. Otherwise you're going to end up with pieces that did not soak up the color and you'll be a spotted tie-dyed weirdo, instead of just the plain ol' tie-dyed kind.


And then comes the finger-painting kid in you, except you're using brushes instead of fingers, and you're painting hair instead of easel paper. But you are, most certainly, wearing a smock. I went from light to dark and then did some lone dark pieces so they stood out and didn't fade as fast. Turquoise to dark blue and light pink to dark hot pink. Swoon! Don't forget to feather the color on so it's not a straight across line. How unappealing would THAT be in your punk hair? Sheesh.


And then, you wait, again. You clean-up dinner, make your husband's lunch, do a load of laundry, flip through some gossip, and then check your progress. After about 40 minutes (an hour wouldn't hurt), you VERY carefully rinse each foil, ONE. BY. ONE. Talk about tedious. But, worthy. After the water runs clear, you shampoo lightly, condish generously, rinse thoroughly, and then check out your My Little Pony worthy "tail"!
For me, personally, you sleep, after 6 hours of hardwork, and then you check out your final product in the am. Curl to get the best effect, and show off your creation to the world, via blog, of course.


What will she do next?! ;-)
perfect!!! it's looks great! x
ReplyDeleteI can't realy good english (I'm from germany) but the pictures say all :) cool style
ReplyDelete